Votre compte a été créé avec succès !
Merci !
0
0 €
0 €
0
0 €
0 €
Total
€
Merci !
Votre compte a été créé avec succès !
Article paru dans The Journal of Prosthetic Dentistry – 2019.
Renaud Noharet DDS, PhD
Eric Van Dooren DDS
For immediate extraction and implant placement, preservation of the natural emergence profile is essential to optimize esthetics. In the technique presented, the Digital Imaging and Communica- tions in Medicine (DICOM) and standard tessellation language (STL) data were merged to simulate the tooth before surgery and to design the interim restoration. The existing tooth and gingival architecture were replicated. (J Prosthet Dent 2019)
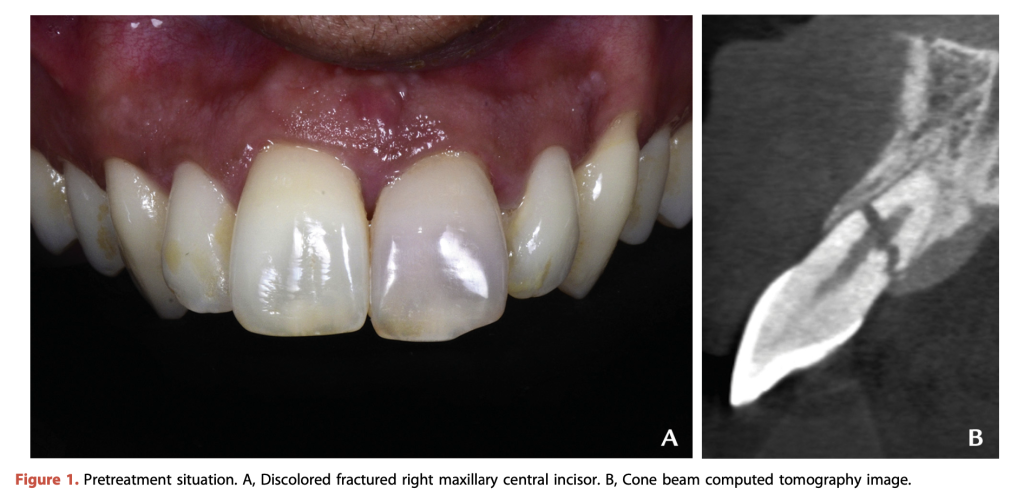
An optimal esthetic outcome for an implant-supported restoration is essential, particularly in the anterior sector. An immediate extraction, implant placement, and immediate restoration protocol can minimize tissue loss, and radiological techniques including cone beam computed tomography (CBCT) can correctly indicate immediate placement treatment. An analysis of residual bone volumes has been facilitated by advances in 3D imaging, which allows more precise implant planning. Correct placement can be achieved by guided surgery techniques and should be combined with prosthetic techniques, including the interim restoration, to preserve the existing periodontal architecture and provide an optimal esthetic result. Reproduction of the cervical and radicular anatomy of the original tooth makes it possible to maintain the level and the architecture of the gingival tissues before extraction.
The purpose of this article was to describe a technique for the creation of an interim tooth that mimics the natural crown contours and emergence profile before the surgical phase. At the same time, the protocol described for making the definitive prosthesis eliminates the need to make a new impression after the bone and gingiva have healed. Both these techniques use computer-aided design and computer-aided manufacturing (CAD-CAM) technology.
The technique illustrated was used to treat a 32-year- old man who was referred to the author’s clinic (R.N.) with a nonrestorable maxillary central incisor with an apical third root fracture (Fig. 1).
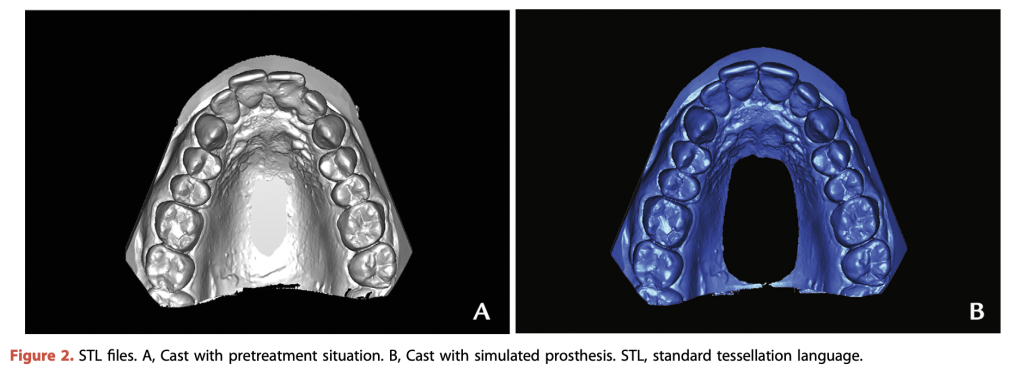
1. Make diagnostic impressions. For this patient, conventional impressions were made, although a digital scan may also be made (Fig. 2). Concur- rently, make a CBCT scan (5G XL; NewTom). Also make photographs to provide information for the dental laboratory technician.
2. Plan the implant location using an implant plan- ning software program (Simplant; Dentsply Sirona) (Fig. 3). Digitize the diagnostic cast using a laboratory CT scanner (S600 ARTI; Zirkonzahn) to obtain a virtual cast as a standard tessellation language (STL) file.
3. Modify the STL file with virtual waxing to obtain a cast with the position of the future tooth (the slight displacement of the tooth caused by the trauma was corrected). Also scan a cast without the rele- vant tooth.
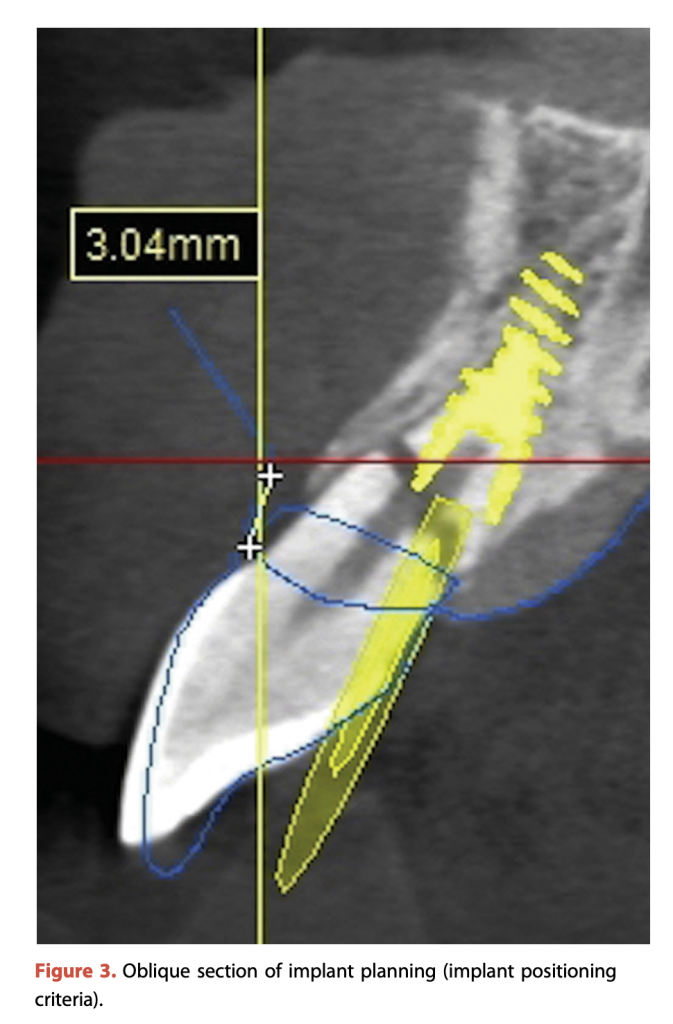
4. Index these casts from the Digital Imaging and Communications in Medicine (DICOM) data so that the implant can be properly positioned based on the biologic and prosthetic parameters. Plan the position 3 mm from the neck of the future tooth (blue line in Fig. 3).
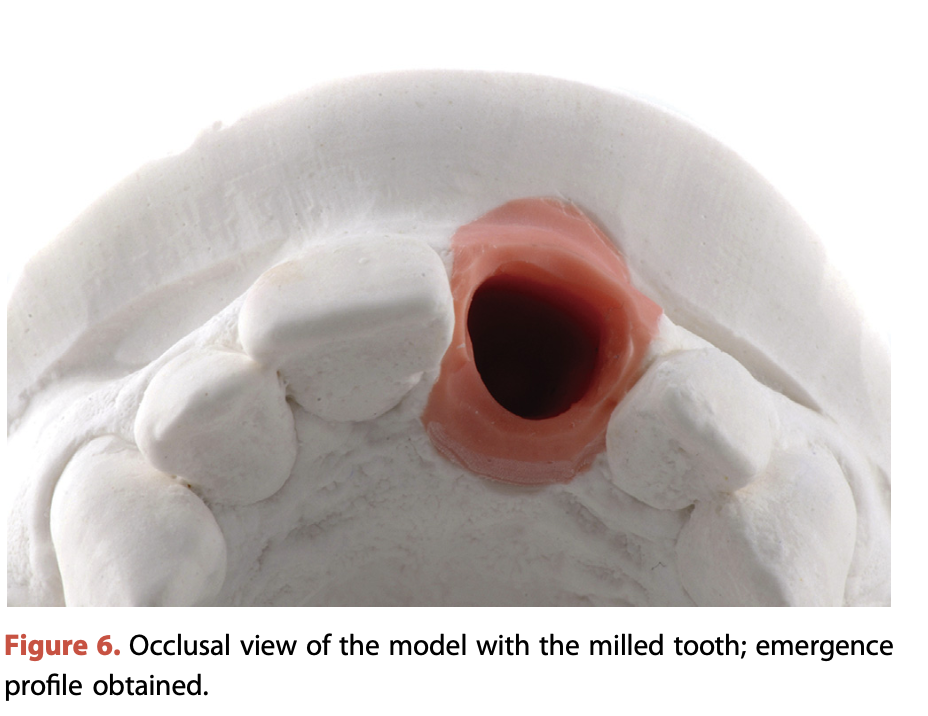
This technique ensures the maintenance of the soft tissue architecture and facilitates the fabrication of the interim restoration for immediate restoration. The technique copies the shape of the natural tooth (crown and emer- gence profile), reducing the time taken to make the interim restoration, which is obtained before surgery. The use of a screw-retained restoration increases the fabri- cation time but makes healing safer because of the absence of excess cement.
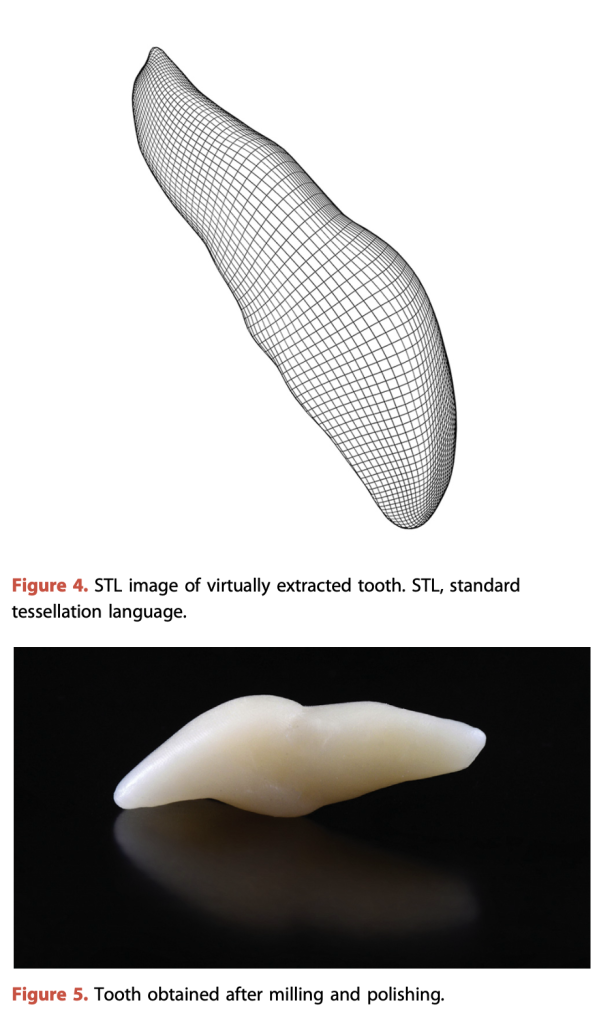
The technique has limitations. An existing metal- ceramic crown may create artifacts in the CBCT image. A solution is to combine the DICOM data from the emergence profile and from the mouth impression for the coronal part. If the crown cannot be extracted in one piece or if the tooth is fractured or absent, the contra- lateral teeth can be mirrored. This situation requires more digital work because the tooth needs to be repositioned in the space. An optical scan can simplify the workflow and complement the DICOM data because only the CBCT scan can give the subgingival emergence profile before surgery.
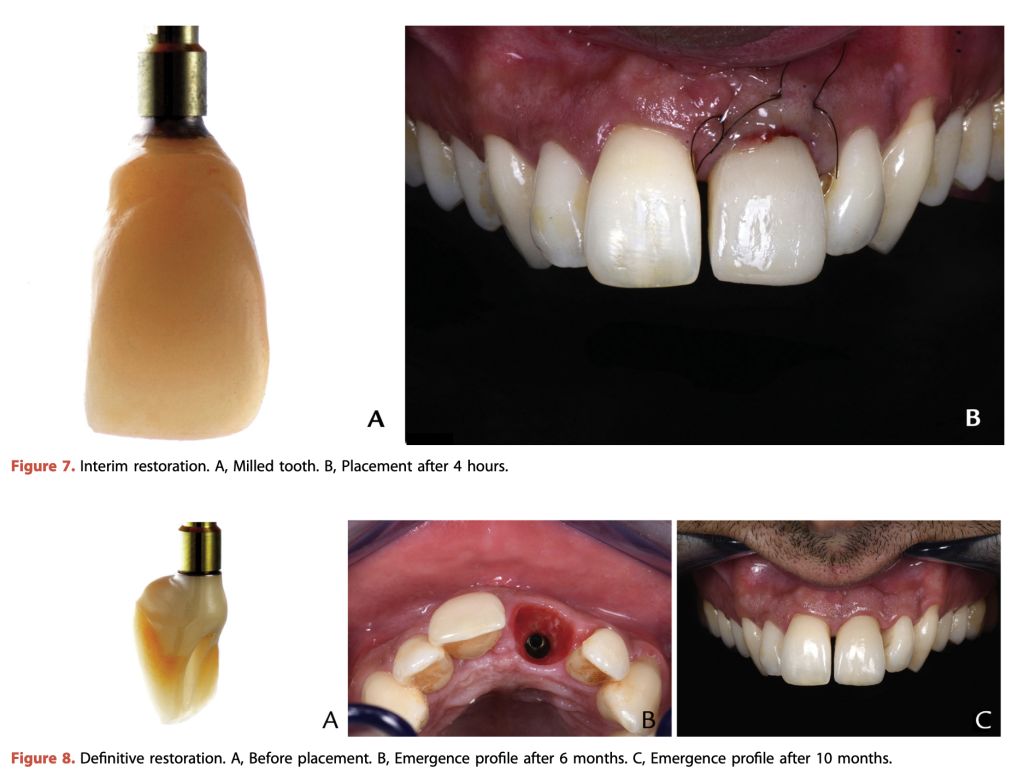
The combination of modern technologies, including CBCT, laboratory scanners, and digital photography, has allowed clinicians to replicate patients digitally. In the technique presented, DICOM and STL data were used to generate the optimal restoration and emergence profile without user bias. The photographic software enabled the restoration to be colored so that it could be used as an interim restoration before the implant surgery. The contours obtained by replicating the natural tooth were used for the definitive restoration. Because the contours were the same, the definitive restoration could be fabri- cated directly without an additional impression or the need to unscrew the healing cap. This approach can be used to optimize the esthetics of both the definitive and interim restoration and minimize the adverse biologic impact of the prosthesis.
Retour
N’hésitez pas
à nous contacter !